Dock setup for code, design, calls
For people who mix Xcode, Figma, and Zoom in one row. Three short docks. Two presets.
Apple’s Dock is one row for every job. It follows your pointer to the other screen, and the icons stay the same, so design, code, and a second display keep sharing it. Ordin adds another dock beside it.
macOS 13 or later · Apple silicon and Intel · 2-day trial, no account.
A short cut of the walkthrough: live window previews, an extra dock, Liquid Glass, and a preset hotkey. Not the full recording.
~10 sec · live preview · extra dock · Liquid Glass · preset hotkey
1 · Live previews
Hover any dock icon, Apple’s Dock or Ordin’s, and see open windows as live thumbnails. Jump straight to the window you need.
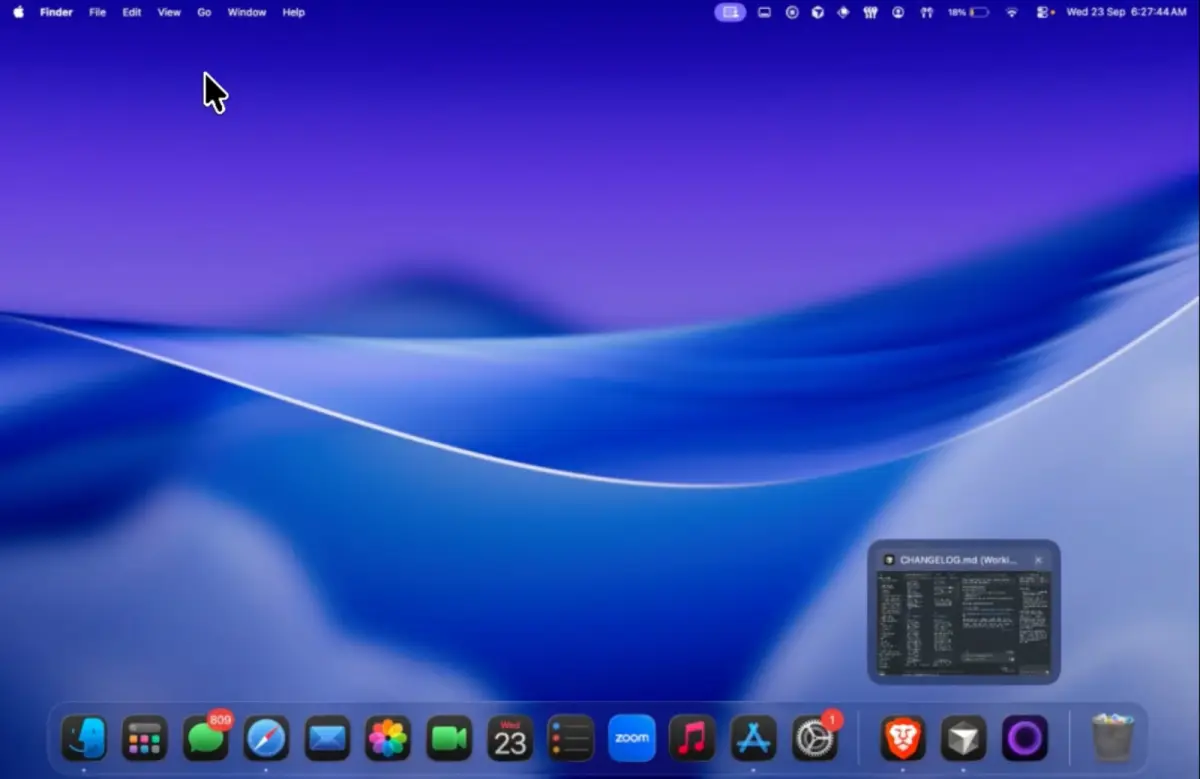
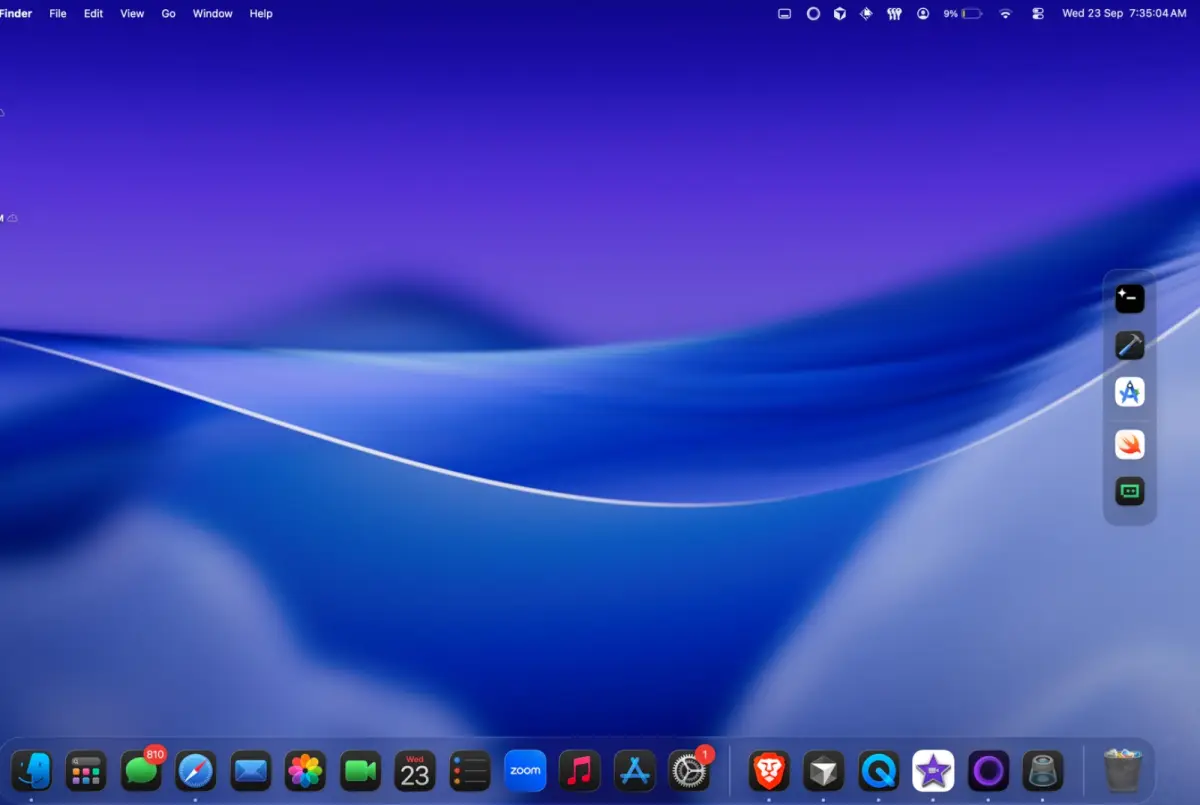
2 · Extra docks
macOS gives you one Dock. Ordin gives you as many as you want: bottom, top, left, right, or floating anywhere.
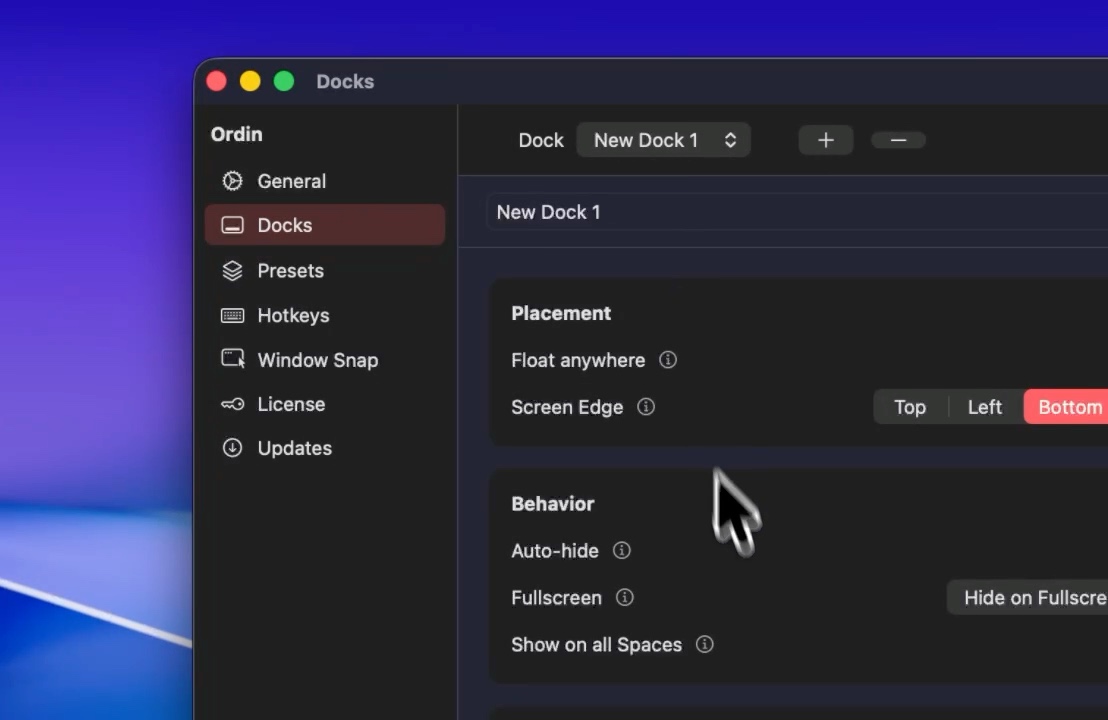
3 · Customizable docks
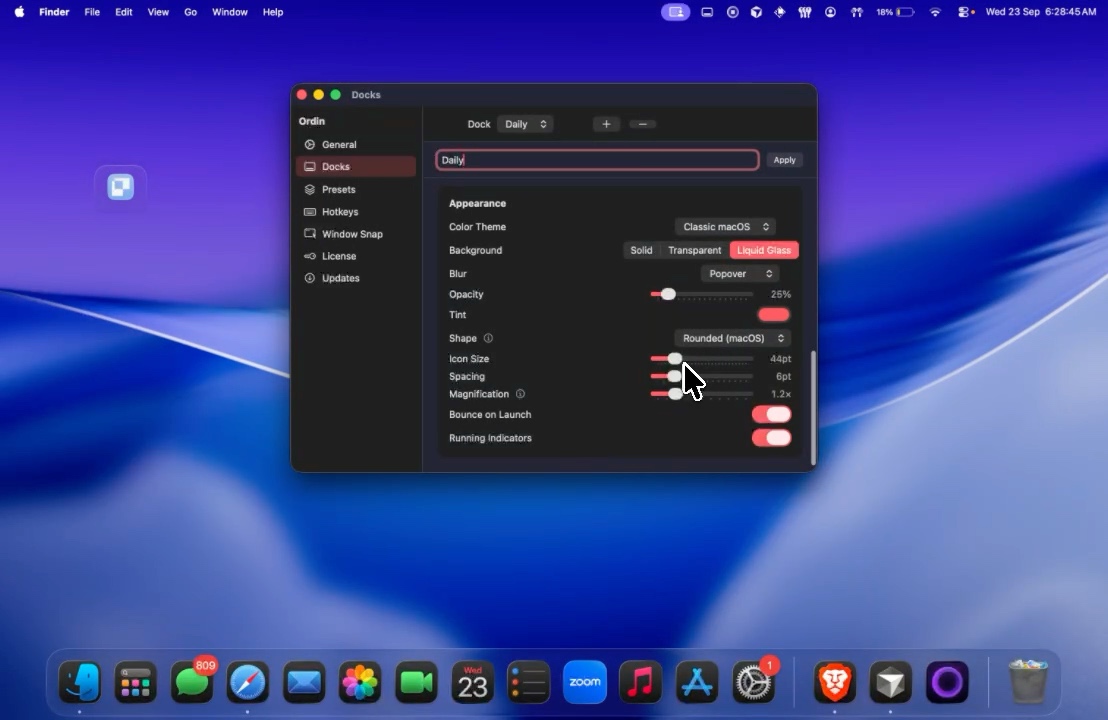
Style each dock independently: themes, icon size, spacing, magnification, tint, and shape, tuned in Settings → Docks.
4 · Widgets inside docks
Drop widgets between icons (clocks, shelves, space indicators, Live Dock mirrors, and TamaDocky) right in the dock row.
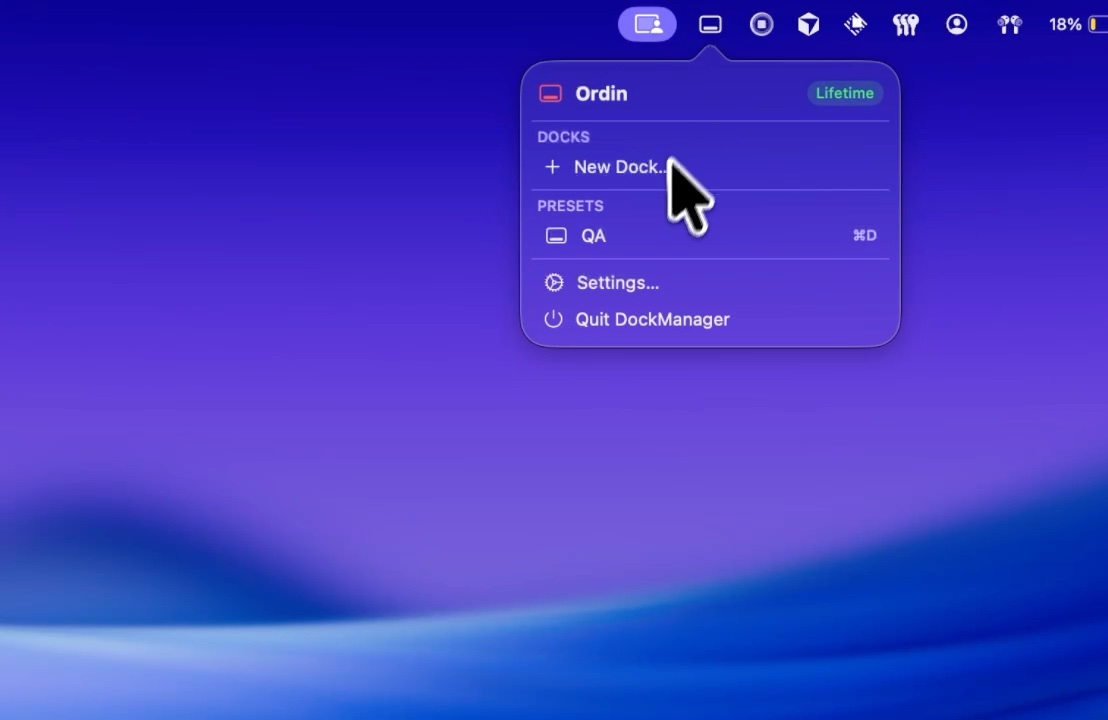
5 · Presets & hotkeys
Save which docks are visible as presets, assign icons, and bind global shortcuts, like ⌘D for a “QA” layout, from the menu bar or Settings.
6 · Liquid Glass
Choose Solid, Transparent, or Liquid Glass backgrounds with popover blur and fine-grained opacity, the same visual language as modern macOS.
Blog
Short notes on extra docks, live previews, and how Ordin fits into a Mac workflow.
For people who mix Xcode, Figma, and Zoom in one row. Three short docks. Two presets.
Hide Apple’s Dock for screen space. Keep a short second strip for the apps of the current job.
A 2-day checklist: prove the empty screen, test presets, pay $12.99 only if you would keep the docks.
Mirror Apple’s pins onto another edge or monitor. One list, two places to reach it.
Apple’s Dock sticks to an edge. A short floating strip can sit next to the window you are in.
Drag exports onto a tray in the dock row. The Desktop stays clear until you need those files.
Command-Tab treats a dozen browser windows as one tile. Command-` walks them. A hover shows the picture.
A fullscreen window already pushes Apple’s Dock away. An extra dock can leave with it, so slides and video stay clear.
Moving the Mac Dock to the side empties the bottom. A vertical Ordin dock sits on the edge while Apple’s Dock stays put.
A clock, a file shelf, a mirror of Apple’s Dock, a Space indicator, and TamaDocky, between the app icons.
macOS includes one Dock. Moving it does not add another. A second dock is a separate bar, and Apple’s Dock can stay.
Five to ten short docks, one per task, each with its own size and look. Presets show only the set you need.
Coming from Windows, the missing piece is usually a dock on the monitor you are looking at. Apple’s Dock can stay.
The MacBook keeps Apple’s Dock. Put a second one on the big screen, with the apps you actually open there.
How multi-monitor Mac users pin an extra dock to each display—and what to put on each strip.
macOS gives you a single Dock for every display and every kind of work. A second dock keeps the apps for that task in reach.
Hover a dock icon and Ordin shows open windows as live thumbnails—jump to the right browser or editor instantly.
No. Apple’s Dock stays on the Mac. Ordin adds extra docks, and it can show live window previews when you hover icons on the system Dock as well.
macOS includes one Dock. It can follow the pointer between displays, and the icons stay one set. A second dock is a separate bar from an app. Ordin adds those and leaves Apple’s Dock in place. The walkthrough is can a Mac have more than one Dock.
Moving Apple’s Dock to the left or right makes that one Dock vertical and leaves the bottom empty. An Ordin dock can be vertical on the side while Apple’s Dock stays on the bottom. The walkthrough is a vertical dock on a Mac.
Any Mac on macOS 13 Ventura or later, whether it is Apple silicon or Intel. The disk image is the same file for the United States and Europe.
The lifetime license is $12.99 and the card is charged in US dollars, for Mac users in the United States and in Europe. Payment is optional during the 2-day trial.
The Ordin app interface is English. The website is available in English, German, French, Spanish, and Italian so Mac users can read the product in those languages before they download.
Yes. Build one short dock per job, such as coding, design, calls, or review, and style each one on its own: size, edge, tint, and background. Presets show only the docks for the task you are in, so five or ten docks do not all sit on screen at once. The 2-day trial includes that setup. A license keeps the larger set afterward. The walkthrough is specialized docks for each task.
Both add extra docks on a Mac. Ordin leaves Apple’s Dock in place, shows live window previews on it, and costs $12.99 once for one Mac. The Ordin vs ExtraDock page and the ExtraDock alternatives list cover pricing, macOS versions, and who each app fits.
The 2-day trial does not ask for an account. If you buy a lifetime license, checkout asks for an email address so the key can be delivered. Card payment is handled by Razorpay and charged in US dollars. Ordin uses that email to issue the key and does not sell it. The full Privacy Policy and Terms are on this site, with Cancellation and Refund, Shipping and Exchange, and Contact Us.
Download and use everything free for 2 days. One payment of $12.99, charged in US dollars, unlocks the app on this Mac for users in the United States and Europe. Updates arrive through Settings → Updates.
Version 1.0.2 is the current disk image. If Ordin is already installed, download it again and replace the app in Applications. The 1.0.0 build asks ordin.app for the update list, and that address does not serve it, so Settings → Updates on that build cannot offer newer builds. Version 1.0.2 checks updates.json on this site.