How to Put a Dock on Every Monitor on Mac
Published 24 September 2026 · 6 min read
If you use two or three displays, you have probably felt the friction: the macOS Dock lives on one screen, and your muscle memory keeps sending you to the wrong edge. Apple does not let you pin a separate Dock to each monitor—but you can add extra docks that stay on the display where you need them.
Why one Dock feels wrong on a wide desk
On a laptop plus external monitor, the system Dock usually sits on the built-in screen. When you are working on the big display, every launch and every app switch sends your eyes and cursor back to the laptop bezel. On a three-monitor setup, the problem is worse: two screens have no Dock at all unless you move Apple’s Dock or chase it with the pointer.
macOS does move the Dock to the active display in some configurations, but it is still one strip shared across the whole desk. Developers, designers, and traders often want different app sets visible on different monitors—terminals on the left, browser in the center, chat on the right—without one overcrowded row of icons.
What “an extra dock per monitor” means
An extra dock is a second (or third) floating dock panel that you pin to an edge of a specific screen. It is not a hack of Apple’s Dock process; it is a companion UI that sits beside the system Dock or replaces it visually on that monitor if you choose.
- Screen-bound: Each dock can follow a display by ID, so unplugging a monitor hides its dock and plugging it back restores the layout.
- Edge choice: Bottom, left, or right—match how you already use the built-in Dock.
- Your apps only: Pin the tools for that display; running apps can appear with live previews on hover.
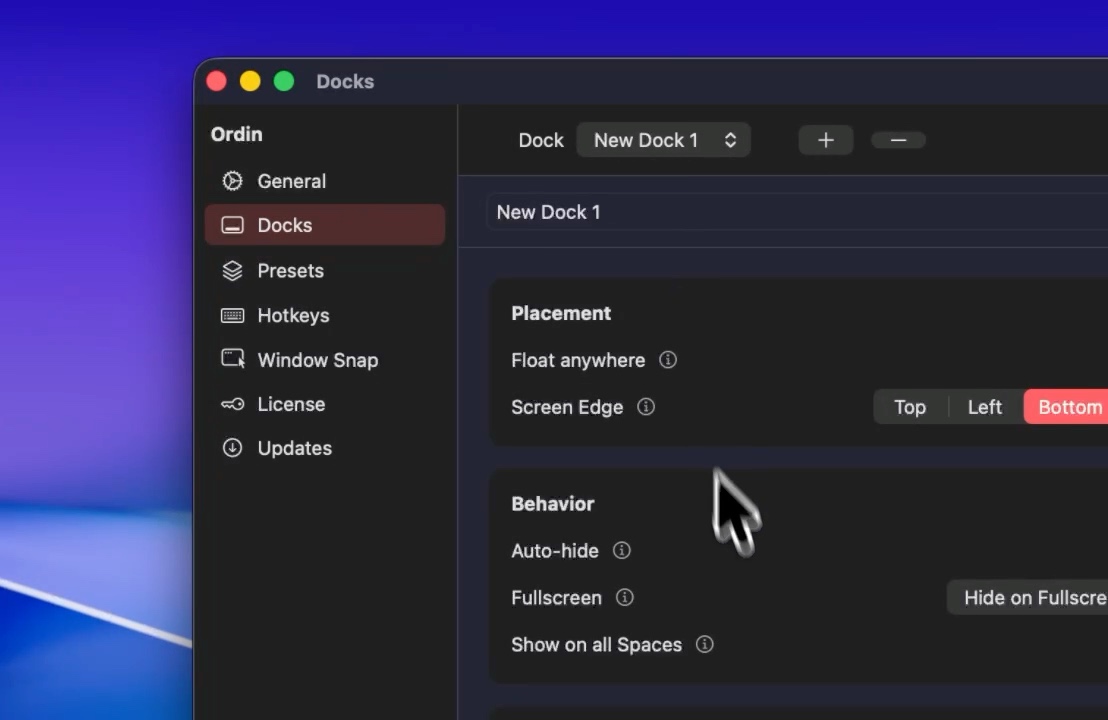
Ordin is built for this pattern: create a dock, assign it to a screen, drag apps from Finder, and leave it visible while you work on that monitor.
A simple three-monitor layout
One layout we see often among Ordin users:
- Left display: Vertical dock with IDE, terminal, Git client, and Docker.
- Center (main): Apple’s Dock or a bottom Ordin dock with browser, Figma, and notes.
- Right display: Slack, mail, and calendar—always visible, never mixed with dev tools.
You are not duplicating every app on every dock. You are giving each screen a launch strip for the work that happens in front of that screen.
Multi-monitor Dock vs. Spaces and Stage Manager
Spaces and Stage Manager organize windows; they do not give you per-monitor app launchers. Mission Control still assumes you will find apps from one Dock or ⌘Tab. Extra docks reduce how often you need full-screen app switchers because the icon you want is already on the monitor you are looking at.
Pairing docks with presets and hotkeys helps when you dock and undock a laptop: one preset for “desk with three screens,” another for “travel with one screen,” each with the right docks visible.
Getting started on your Mac
- Connect your monitors and note which is main in System Settings → Displays.
- Install Ordin (macOS 13 Ventura or later, Apple silicon or Intel).
- Create one dock per display from the menu bar; pin each to bottom, left, or right on that screen.
- Drag apps onto each dock; enable live previews if you juggle many windows per app.
Ordin offers a 2-day trial with no account. A lifetime license is $12.99 if you keep it after the trial.
Ordin — extra docks, live window previews, widgets, and Liquid Glass on Mac.
Download for MacRelated: Dock on an external monitor · One Dock is a bottleneck · Live window previews · Ordin vs ExtraDock